The short answer
Keep the guest list in Google Sheets with one row per household and one column per part of the address. Add a tick-box column for save-the-dates and another for invitations. To print, either build each label’s text with a formula and paste the ticked rows into a Google Docs table sized like your labels (free, a little fiddly), or use an add-on such as LabelRows, which reads the rows and lays out a label Doc for you. Print one test page on plain paper, line it up against a label sheet, then print on the real labels.
The rest of this guide covers what makes wedding mail different from ordinary address labels: how to write couples’ and families’ names, which label size suits formal names, tracking who has been sent what, the RSVP envelopes, guests abroad, timing and postage. Nothing here needs a paid tool.
Are address labels okay on wedding invitations?
An honest answer first, because it decides how much of this guide you need. Traditional etiquette says formal wedding invitations are addressed by hand, ideally by someone with neat handwriting or a calligrapher. That tradition is real, and if your wedding is black tie and your families care about these things, hand-addressing the outer envelopes of the invitations is still the safe choice.
Most couples today mix and match, and printed labels are widely accepted for:
- Save-the-dates. They are informal by nature, often postcards, and they go out to the whole list at once. Labels are the usual choice.
- Casual and medium-formal weddings. A clean label in a classic font looks tidy, and every guest can read their name and address.
- RSVP return envelopes. These carry your address, not the guest’s, and you need one per invitation. Nobody expects them to be handwritten.
- Large lists. Hand-addressing 150 envelopes takes many hours. Printing them takes an evening, including the test page.
- Thank-you notes after the wedding, and holiday cards to the same list later.
If labels feel too plain for the invitations themselves, two middle paths work well. Clear labels almost disappear on white or ivory envelopes, so the address looks printed on. Or print the guest addresses straight onto the envelopes with a Word mail merge (method 3 below), which most home printers can do with care. Whatever you pick for the invitations, the same Google Sheets guest list serves all of it.
Set up the guest list once
The single most useful decision is one row per household, not one row per person. Invitations are mailed to addresses, so a couple, a family with children, or roommates sharing a flat each get one row and one envelope. Keep how many people that row covers in a number column, so you can still count heads for the caterer.
A layout that covers everything in this guide:
| Col | Header | What goes in it |
|---|---|---|
| A | Name line | The name exactly as it should print on the envelope: “Mr. and Mrs. James Carter”, “Olivia Reed and Sam Lee”, “The Okafor Family”. |
| B | Name line 2 | Optional second line for long names or a second household member, such as “and Mr. Sam Lee”. Usually empty. |
| C | Street | House number and street. |
| D | Apt | Apartment, suite or unit, if any. |
| E | City | |
| F | State | Two-letter code for US addresses (OH, CA). |
| G | ZIP | Formatted as plain text, so leading zeros survive. |
| H | Country | Empty for US addresses; the country name for guests abroad. |
| I | Side | Whose guest: one partner, the other, or “Both”. Handy for balancing the list. |
| J | Guests invited | How many people the invitation covers. |
| K | Save the date | Tick box: a save-the-date goes to this household. |
| L | Invite | Tick box: an invitation goes to this household. |
| M | RSVP | Yes, No, or empty while you wait. |
| N | Attending | Number of people coming, filled in as replies arrive. |
| O | Thank-you sent | Tick box for after the wedding. |
| P | Notes | Inner envelope wording, meal choices, gift received, “moved in May”. |
A few setup details that save trouble later:
- Make the ZIP column plain text before you type. Select column G and choose Format → Number → Plain text. Otherwise Sheets reads 02109 as the number 2109 and your Boston guests get a four-digit ZIP code. To repair codes that have already lost their zero, put
=TEXT(G2, "00000")in a spare column, fill it down, then copy it and paste it back over column G with Edit → Paste special → Values only. - Insert real tick boxes in K, L and O: select the column below the header and choose Insert → Checkbox. Counting formulas and label tools both rely on real tick boxes, not the word TRUE typed in.
- Freeze the header row (View → Freeze → 1 row) so the column names stay visible while you scroll through a long list, and so sorting never moves the headers.
- Keep the Notes column off your labels. Labels only print the columns you name, so private notes such as “plus-one only if still dating” never end up on an envelope.
Collecting addresses with a Google Form
Chasing addresses by text message is the slowest part of wedding mail. A short Google Form shared in the family group chat does most of the work. Ask for the name as they’d like it written, street, apartment, city, state or region, postal code, country, and the number of people at the address. Use separate questions for each part, so the answers land in separate columns you can copy straight across.
The responses fill a linked sheet automatically. Treat that sheet as an inbox: check each new answer, fix obvious typos and capitalisation, and copy it into your guest list tab with Paste special → Values only. Keeping the master list separate means a guest who submits the form twice, or a form setting you change later, can’t scramble the list you print from.
How to write names on the envelope
Wedding envelopes are where naming conventions matter most, and the label prints whatever is in the Name line column, so it’s worth getting the column right once. These are the common conventions in the US; when you are unsure about a particular guest, the way they sign their own cards is the best guide.
| Household | Formal outer envelope | Less formal |
|---|---|---|
| Married couple, shared last name | Mr. and Mrs. James Carter, or Mr. James and Mrs. Olivia Carter | James and Olivia Carter |
| Couple with different last names | Ms. Olivia Reed and Mr. Sam Lee (one line each if long) | Olivia Reed and Sam Lee |
| Unmarried couple at one address | Ms. Rosa Delgado and Mr. Tom Byrne | Rosa Delgado and Tom Byrne |
| A doctor in the couple | Dr. Ana Ruiz and Mr. Mark Ruiz | Ana and Mark Ruiz |
| Family with children invited | Mr. and Mrs. Emeka Okafor (children named on the inner envelope) | The Okafor Family |
| Single guest with a plus-one | Ms. Hannah Price (“and Guest” goes on the inner envelope) | Hannah Price |
Two conventions trip people up. First, “and Guest” traditionally goes on the inner envelope, not the outer one: the outer envelope is for the postal address, the inner one says who is invited. If you are not using inner envelopes, many couples write “Ms. Hannah Price and Guest” on the outer envelope, which is fine for a less formal wedding. Second, children over 18 usually get their own invitation, even when they live at home, so give them their own row with the same address.
Inner envelopes are hand-written and never mailed, so there is nothing to print for them. Keep the wording in the Notes column (“Mr. and Mrs. Carter”, or “Aunt Olivia and Uncle James”) so whoever stuffs the envelopes has it to hand.
Build the name line from separate columns
If your list already keeps titles, first names and last names in separate columns, a formula can draft the name line so you only correct the exceptions. Put the parts in spare columns to the right of the list, say R Title 1, S First 1, T Last 1, U Title 2, V First 2 and W Last 2, then in X2:
=IF(V2="", TRIM(R2&" "&S2&" "&T2),
 IF(AND(W2=T2, R2<>"", U2<>""),
  R2&" and "&U2&" "&S2&" and "&V2&" "&T2,
  TRIM(R2&" "&S2&" "&T2)&" and "&TRIM(U2&" "&V2&" "&W2)))
It handles the three common cases. Mr. James Carter with Mrs. Olivia Carter gives Mr. and Mrs. James and Olivia Carter. Ms. Olivia Reed with Mr. James Carter gives Ms. Olivia Reed and Mr. James Carter. Dr. Ana Ruiz on her own gives Dr. Ana Ruiz. If the titles are empty, it falls back to full names joined with “and”, such as Ngozi Okafor and Emeka Okafor, rather than leaving a stray “and” at the start. We checked all four cases in a spreadsheet before publishing.
For a less formal wedding, the first-name version reads more warmly:
=IF(V2="", TRIM(S2&" "&T2),
 IF(W2=T2, S2&" and "&V2&" "&T2,
  S2&" "&T2&" and "&V2&" "&W2))
That gives James and Olivia Carter or Olivia Reed and James Carter. Fill the formula down, check the results, then copy column X and paste it into the Name line column as values. Do your corrections there, by hand: a formula is a first draft, and the name on a wedding invitation is worth a human look.
Long names and small labels
A formal name line gets long quickly. “Mr. and Mrs. James and Olivia Carter” is 36 characters, which is close to the width of a 1″ × 2⅝″ label at 10 pt, so it may wrap onto a second line. Flag the long ones with a helper column:
=IF(LEN(A2) > 30, "LONG", "")Thirty characters is a rule of thumb, not a measurement: some letters are wider than others, and fonts differ. For each LONG row, either use the shorter form (“Mr. and Mrs. James Carter”), split the name across Name line and Name line 2, or choose the larger 2″ × 4″ label described below, which has room for long names at a bigger size.
Clean up the addresses before you print
A wedding list is assembled from many sources: old holiday card lists, a parent’s address book, form answers, screenshots from group chats. It shows. Spend twenty minutes on these checks before you buy postage:
- State codes. US addresses should use the two-letter capital code. This flags anything else for rows without a country:
=IF(OR(H2<>"", AND(LEN(F2)=2, EXACT(F2, UPPER(F2)))), "", "CHECK STATE"). It catches “Ohio”, “oh” and “O.H.”. - Missing pieces. Sort by Street, then by ZIP (Data → Sort range, with “Data has header row” ticked). Rows with an empty street or ZIP code jump to the top or bottom, where you can see them.
- Apartment numbers. These are the most common reason an invitation comes back. If a guest lives in a building, ask.
- Abbreviations. Etiquette guides traditionally spell out Street, Avenue and Apartment on formal invitations, while the Postal Service’s own style is the short form (St, Ave, Apt). Mail is delivered either way, so pick one style and use it consistently across the list.
- Capitalisation. Form answers in all lowercase look careless on a wedding envelope.
=PROPER(C2)fixes most of them, but check names such as McDonald and street names with “NE” or “SW”, which PROPER gets wrong.
One invitation per household
The classic mistake is two invitations to one house, because the same address arrived from both families under different names. Flag shared addresses before you print. In a spare column, build a simple key from the street and ZIP code:
=LOWER(SUBSTITUTE(SUBSTITUTE(TRIM(C2), ".", ""), ",", ""))&"|"&LEFT(G2, 5)Then, next to it (this example assumes the key is in column Z):
=IF(COUNTIF(Z$2:Z$300, Z2) > 1, "SAME ADDRESS", "")The key ignores capitals, full stops and commas, so “77 Birch St.” and “77 birch st” match, and it uses only the first five digits of the ZIP code. It won’t match “Street” against “St”, so also sort by ZIP code and glance down the list: near-duplicates end up next to each other. When two rows share an address, decide whether they are one household (merge them into one row and one name line) or two invitations on purpose, such as an adult child living at home.
The same check is useful for any list you mail every year, and our Christmas card address labels guide uses it for the holiday card list.
Track save-the-dates, invitations and replies
The tick boxes are what turn a list of addresses into a wedding planner. Save-the-dates usually go to everyone you are sure to invite; invitations might go to a few more people, or fewer if plans changed. Ticks let you print labels for exactly the right rows each time without deleting anyone.
A small summary block somewhere to the side keeps the numbers in view:
| What | Formula |
|---|---|
| Save-the-dates to send | =COUNTIF(K2:K300, TRUE) |
| Invitations (envelopes) to send | =COUNTIF(L2:L300, TRUE) |
| People invited | =SUMIF(L2:L300, TRUE, J2:J300) |
| Invitations still waiting for a reply | =COUNTIFS(L2:L300, TRUE, M2:M300, "") |
| People attending so far | =SUMIF(M2:M300, "Yes", N2:N300) |
| Invitations to one partner’s side | =COUNTIFS(I2:I300, "Maya", L2:L300, TRUE) |
| Invitations going abroad | =COUNTIFS(L2:L300, TRUE, H2:H300, "<>") |
| Sheets of 30 labels needed | =ROUNDUP(COUNTIF(L2:L300, TRUE)/30, 0) |
Replace “Maya” with the name you use in the Side column. We ran each formula on a test list with ticked and unticked rows, a missing reply and an address abroad. The “abroad” count matters because international mail needs different postage (more on that below), and the labels count tells you how many label sheets to buy; buy one or two extra for the test page and mistakes.
Before you send invitations, copy the Save the date column into a new column called “STD sent” and paste it as values. Then you have a record of who got a save-the-date even if you later change the ticks, which helps when someone asks why they didn’t get one.
A tip for reply cards. Every wedding gets a few RSVP cards back with the names left blank. Write the guest list row number in pencil, small, on the back of each reply card before it goes into the envelope. When an unsigned card comes back, the number tells you whose it is.
Which label size for wedding mail?
Most wedding mail needs one of two sizes. Both are standard US Letter sheets sold by Avery® and other brands, and both are free sizes in LabelRows.
| Label | Size and count | Good for | Text room |
|---|---|---|---|
| Avery® 5160 and compatible (8160, 5260, 18160 and others) | 1″ × 2⅝″, 30 per sheet | Save-the-dates, standard invitation envelopes, RSVP envelopes, thank-you notes | About 5 short lines at 10 pt |
| Avery® 5163 and compatible (8163, 5263 and others) | 2″ × 4″, 10 per sheet | Large or square invitation envelopes, long formal names, a bigger, more elegant font | About 9 lines at 12 pt, with room to go larger |
The 30-per-sheet size is the workhorse: cheap, easy to find in clear and white, and big enough for a name and a three-line address. It is a little small for a formal name line in a serif font, which is where the 2″ × 4″ size helps. Ten labels per sheet sounds expensive, but for a 120-household list that is 12 sheets, and the larger label lets you print the name at 14 pt and the address at the same size, which reads much more like a printed envelope than a sticker.
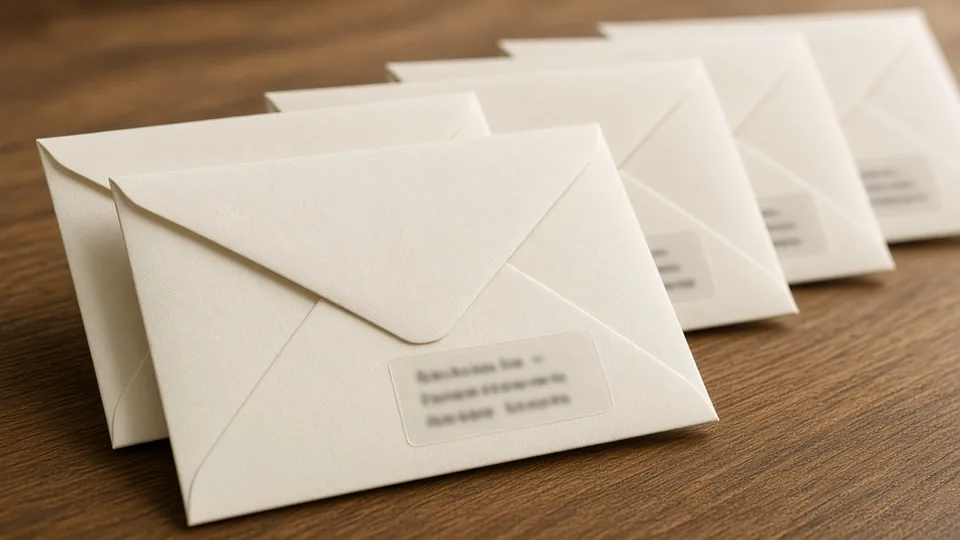
Clear labels are sold in the same 30-per-sheet layout as the 5160. Check the packet says it matches 5160 sheets, and check whether it is made for inkjet or laser printers, because clear labels for one usually smear or flake in the other. Clear labels show any dust or fingerprints, so handle them by the edges and let inkjet ink dry for a few minutes before stacking.
Outside the US, the A4 equivalents are the 21-per-sheet L7160 (63.5 × 38.1 mm) and the 14-per-sheet L7163 (99.1 × 38.1 mm). Both are free sizes in LabelRows too.
Return-address labels and the small 80-per-sheet sizes are covered in the RSVP section below. For full measurements of the two US sizes, see our Avery 5160 guide and Avery 5163 guide.
Method 1, free: a Google Docs label table
This method needs nothing installed. You build each label’s text in the sheet, keep only the ticked rows, arrange them three across, and paste the block into a Google Docs™ table sized like the label sheet.
- Make the label text. In a spare column, say Y2, enter:
=TEXTJOIN(CHAR(10), TRUE, A2, B2, C2&IF(D2="", "", " "&D2), E2&", "&F2&" "&G2, UPPER(H2))
and fill it down.CHAR(10)starts a new line inside the cell.TEXTJOINwithTRUEskips the empty parts, so a household with no Name line 2 or no country doesn’t get a blank line, and the apartment only appears when there is one. - Keep the ticked rows, three across. In an empty area of another tab, enter:
=WRAPROWS(FILTER(Guests!Y2:Y300, Guests!L2:L300=TRUE), 3, "")
using your tab’s name in place of Guests. Use column K instead of L for save-the-dates. The""stops the last row filling with #N/A when the count isn’t a multiple of three. - Copy the block into a new Google Doc and choose Paste unlinked if Docs asks. Set the page margins, the three column widths and the row height to the label sheet’s measurements; the 5160 guide has the exact figures.
- Pick the font for the whole table: Georgia or Times New Roman look more like stationery than the default Arial. Centre the text if your invitations use centred type.
- Print one page on plain paper at 100% scale, hold it against a label sheet in front of a window, and adjust the margins before using real labels.
Where it falls short: every label is a table cell, so a label with an extra line, such as a long name that wraps, makes its row taller and pushes every label below it out of line. Each page after the first needs another 30-label block pasted and checked. For a page or two of save-the-dates it works well; for a 150-household list it gets tedious, and any change to the guest list means building the Doc again. The address labels guide walks through this method in more detail.
Method 2: an add-on (LabelRows)
LabelRows is the Google Sheets™ add-on we make. It reads the rows straight from your guest list and lays out a Google Doc of labels for the size you pick, so there is no table to size and nothing to paste. It is text only: it prints the words from your columns in one font, with no images or monograms.
- Install LabelRows from the Google Workspace Marketplace, open your guest list and click the LabelRows icon (an orange tag) in the side panel on the right.
- Pick the size: Address labels 1″ × 2⅝″ (30 per sheet) for 5160-type labels, or Shipping labels 2″ × 4″ (10 per sheet) for the larger 5163 type. Despite the name, the 2″ × 4″ size is just a bigger label, and it suits invitation envelopes well.
- Write the label with your column names in double braces:
{{Name line}}
{{Name line 2}}
{{Street}} {{Apt}}
{{City}}, {{State}} {{ZIP}}
{{Country}}
A line whose fields are all empty is left out, so households without a second name line or a country don’t get a gap, and a stray “, ” left by a missing city is tidied away. - Choose which rows to print. Under Only rows ticked in, choose the Invite column (or Save the date). You can also print A range of rows or just the rows you have selected, which is handy for reprinting one spoiled label.
- Set the style. Pick one of eight fonts (Georgia and Times New Roman suit wedding mail), a size from 5 to 36 pt, left or centred text, and top or middle vertical position. For the 30-per-sheet size, 10 or 11 pt is about as large as a five-line address goes; on the 2″ × 4″ size, 12 to 14 pt looks good.
- Print the free test page on plain paper. It outlines every label so you can hold it against a real sheet; if it is off, set Printer alignment and print another.
- Click Create labels. LabelRows makes a new Google Doc with the labels in place and tells you how many it made and how many rows it skipped as unticked or empty. Open the Doc and look through it before printing: a long name that wraps is easy to spot here, and easy to fix in the sheet.
To be plain about the limits: the free plan stops at 60 labels per Doc, so a large list takes two or three Docs made with row ranges. Starting part-way through a used sheet of labels (skipping the labels already peeled off) and the other sizes are planned for a Pro plan that isn’t on sale yet. If you have half a sheet left over, print those few labels with the Docs method instead.
Method 3: Word mail merge, or printing on envelopes
If you have Microsoft Word, its mail merge reads a CSV file from Google Sheets and can print either label sheets or the envelopes themselves.
- Make a print tab. So the file only holds the people you are mailing, add a tab and put this in A1:
={Guests!A1:P1; FILTER(Guests!A2:P300, Guests!L2:L300=TRUE)}
It copies the header row and then only the rows ticked in the Invite column. - Download it with that tab open: File → Download → Comma-separated values (.csv). Sheets saves only the current tab.
- In Word, choose Mailings → Start Mail Merge → Labels and pick the label product (Avery US Letter 5160 or 5163), or Envelopes and the envelope size.
- Select Recipients → Use an Existing List, choose the CSV, then insert the fields (Name line, Street and so on) into the first label or the envelope’s address box.
- Preview, then Finish & Merge. For labels, click Update Labels first so every label gets the fields.
Printing directly on envelopes looks the most like hand-addressing, but it is slower and more fussy than labels: feed one test envelope first, check which way up and which way round your printer wants it, and expect a few misfeeds with thick or textured envelopes. Avery’s free online designer can also import a spreadsheet file if you want a design around the address, such as a small border; the CSV from step 2 works there too.
Printing tips for good-looking labels
- Print at 100% or “Actual size”. “Fit to page” shrinks the layout a few percent, and by the bottom row the text drifts off the labels.
- Use the right paper setting. Choose “Labels” or a heavier paper type in the print dialog if your printer has one. It slows the feed and reduces skew.
- Feed one sheet at a time if the printer tends to grab two, and fan the label sheets before loading so they don’t stick together.
- Do a single real sheet before the rest. Even after a good test page, print one real sheet and stick a label on an actual envelope. Check the font size from arm’s length.
- Print in the order you will stuff envelopes. Sort the list by last name or by Side first, then labels come out in an order that is easy to match with invitations. Sorting won’t affect your formulas as long as you sort the whole list with the header row ticked.
- Keep spare sheets for the addresses that change after you print. Someone always moves.
RSVP envelopes and return addresses
Two kinds of label carry your own address rather than a guest’s: the return address on every outer envelope, and the address on the RSVP envelope tucked inside each invitation, which the guest posts back to you. Both are the same address on every label, which a spreadsheet doesn’t do on its own, so the trick is to make the rows yourself.
- Add a tab called Return with the headers Name, Street, City line.
- Type the address once in row 2: whoever is receiving the replies, often the couple or a parent who is hosting.
- Copy row 2 down into as many rows as you need labels: rows 3 to 31 for one full sheet of 30, or rows 3 to 61 for two.
- Print those rows as labels with any of the methods above. In LabelRows the template is simply
{{Name}}.
{{Street}}
{{City line}}
The 30-per-sheet 1″ × 2⅝″ label fits most RSVP envelopes and leaves room for the stamp, which you put on before mailing the invitation, so the guest only has to drop it in a postbox. For the return address on the back flap of the outer envelope, the same label works, though many couples prefer the smaller return-address sizes.
Those small sizes, such as the 80-per-sheet ½″ × 1¾″ (Avery® 5167) and the 60-per-sheet ⅔″ × 1¾″ (Avery® 5195), are not in LabelRows Free; they are planned for the Pro plan, which isn’t on sale yet, as is printing several copies of one row. You can still make them free in Google Docs: our Christmas card guide has the table measurements for the 80-per-sheet size, and you only need to build it once.
Guests abroad
Weddings bring in relatives and friends from other countries, and their addresses don’t follow “City, ST 12345”. Forcing them into it makes labels the other country’s post office struggles to read. Two habits fix it:
- Fill the Country column for every address outside the US, and leave it empty for US addresses. The USPS asks for the country name in capitals on the last line, which the label formula above and the
{{Country}}line in LabelRows both handle, and an empty country prints nothing. - Write the rest the way the guest’s country does. In the UK the postcode goes on its own line after the town; in much of Europe the postcode comes before the city; in Japan the order can run from the largest area to the smallest. If an address doesn’t fit your columns, type it into the Street column with line breaks inside the cell (Ctrl+Enter, or ⌘+Enter on a Mac) and leave City, State and ZIP empty. Ask the guest to send their address exactly as they write it; copying their version is always safest.
Send international invitations and save-the-dates earlier than domestic ones, since airmail can take one to several weeks, and give guests travelling from abroad more notice in general: they may need flights, leave from work and sometimes a visa.
When to send what
These are the usual US conventions, not rules, and a destination wedding or a holiday-weekend date shifts everything earlier:
| Mailing | Usual timing | What to print |
|---|---|---|
| Save-the-dates | 6 to 8 months before; 8 to 12 months for a destination wedding | Guest labels for rows ticked in Save the date |
| Invitations | 6 to 8 weeks before | Guest labels for rows ticked in Invite, return labels, RSVP envelope labels |
| RSVP deadline | 3 to 4 weeks before the wedding | Nothing; update RSVP and Attending as cards arrive |
| Thank-you notes | As soon as you can after the wedding, ideally within a few months | Labels for rows ticked in Thank-you sent once written |
Write the dates into the sheet: a small “Plan” area with each mailing and its date keeps the deadlines visible to both of you. And print save-the-date labels early. Address problems surface when the first batch comes back, which is much better than finding them with the invitations.
Postage and mailing
Wedding invitations are often heavier and stiffer than ordinary letters: card stock, an inner envelope, a reply card with its own envelope, a map or a details card. Before you buy stamps, take one fully assembled invitation to the post office and have it weighed and measured. That one visit tells you the postage for the whole batch.
- Weight. A standard First-Class stamp covers a letter up to one ounce. Many invitations weigh more, so they need additional postage.
- Shape. Square envelopes, very rigid ones, and envelopes with wax seals or bows can’t go through the USPS sorting machines and carry a nonmachinable surcharge. A rectangular envelope of ordinary thickness avoids it.
- Hand-cancelling. Some couples ask the post office to hand-cancel invitations so the machines don’t mark or bend them. Ask at the counter; it depends on the office.
- The reply envelope needs its own stamp at the ordinary letter rate, unless you use reply postcards, which need less.
Postage rates change from time to time, so check the current prices on the USPS website or at the counter rather than relying on a number from a guide. Count international invitations separately with the “abroad” formula above, because each one needs international postage.
Holiday season: engagements, save-the-dates and cards
Late autumn is when a lot of wedding mail gets planned. Many couples get engaged over the holidays, and anyone marrying next summer or autumn sends save-the-dates in the first months of the new year. Some combine the two: a holiday card that doubles as the save-the-date, with the photo on the front and the date on the back. If you do, tick Save the date for that list and print once.
The guest list is also a good holiday card list. Once the wedding is over, the addresses are fresh and checked, and a few extra columns turn it into the list you mail every December. Our Christmas card address labels guide shows how to keep a yearly card list with a tick per year, so the work you put into the wedding list keeps paying off.
After the wedding: thank-you notes
Thank-you notes go to the same addresses, so the hard work is already done. Use the Notes column, or a Gift column if you prefer, to write down each gift as it arrives, and tick Thank-you sent when a note is written. To print labels only for notes that are written but not yet mailed, add a column “Ready to mail”, tick it as you write, and print the ticked rows. Untick them once they are posted.
Gifts often arrive from people who aren’t on the guest list, such as a parent’s colleague. Add a row for each one, untick Save the date and Invite, and the same labels and counts still work.
Troubleshooting
The labels drift lower down the page. The print dialog is set to “Fit to page” or a scale below 100%. Set the scale to 100% or Actual size and print the test page again.
The whole layout is shifted a few millimetres. Printers differ slightly. In the Docs method, adjust the top and left page margins; in LabelRows, set Printer alignment and print another test page.
A label has a blank line in the middle. In the Docs method, check that the label formula uses TEXTJOIN(CHAR(10), TRUE, …) with TRUE, which skips empty parts. In LabelRows, a line with only empty fields is dropped already, so the blank line is probably a cell with a single space in it: clear the cell.
A ZIP code shows four digits. The column was a number when it was typed. Format it as Plain text and repair it with =TEXT(G2, "00000") as described in the setup section.
“No matches are found in FILTER evaluation.” No row is ticked in the column you filter on, or the column holds the typed word TRUE rather than tick boxes. Select the column and choose Insert → Checkbox, then tick again.
The invitation count is 0 although boxes are ticked. Same cause: COUNTIF(…, TRUE) counts real tick boxes only.
More than 60 labels in LabelRows Free. Make one Doc for rows 2 to 120 and another for 121 to 240 with A range of rows. The tick column still applies inside each range, so unticked rows are skipped.
A long name runs onto two lines. Shorten it, move part of it to Name line 2, lower the font size slightly, or switch to the 2″ × 4″ label.
Frequently asked questions
Is it okay to use address labels on wedding invitations?
Yes, for most weddings. Traditional etiquette prefers hand-addressed formal invitations, but labels are widely accepted for save-the-dates, casual and medium-formal weddings, RSVP envelopes and thank-you notes. Clear labels or printing straight onto the envelope look closest to hand-addressing.
How do I print wedding address labels from Google Sheets for free?
Build each label in one cell with TEXTJOIN and CHAR(10), keep the ticked rows with FILTER, arrange them three across with WRAPROWS, and paste the block into a Google Docs table sized like your labels. Or use the free LabelRows add-on, which reads the rows and lays out the label Doc for you.
What size labels should I use for wedding invitations?
The 1" x 2-5/8" 30-per-sheet size (Avery 5160 and compatible) suits save-the-dates, standard envelopes and RSVP envelopes. For long formal names, large or square envelopes, or a bigger font, use the 2" x 4" 10-per-sheet size (Avery 5163 and compatible).
How do I address an invitation to a couple with different last names?
Write both full names, joined with and: Ms. Olivia Reed and Mr. Sam Lee, or Olivia Reed and Sam Lee for a less formal wedding. If the line gets long, put the second name on its own line.
Where does "and Guest" go?
Traditionally on the inner envelope, with the outer envelope carrying only the invited guest's name and address. Without inner envelopes, many couples write "Ms. Hannah Price and Guest" on the outer envelope.
How do I print labels only for the people getting an invitation?
Add a tick-box column called Invite and tick each household. In the Docs method, FILTER on that column; in LabelRows, choose it under Only rows ticked in. Use a separate Save the date column for save-the-dates.
How many labels can LabelRows print for free?
Up to 60 labels per Doc on the 5 free sizes, which include both common wedding sizes. For a longer guest list, make a second Doc with a row range. A Pro plan with larger runs and more sizes is planned but is not on sale yet.
How do I make labels for the RSVP envelopes?
Make a tab with your own address in row 2, copy that row down as many times as you need labels, and print those rows as labels. Put the stamp on the reply envelope before mailing the invitation.
Related
- How to print Christmas card address labels from Google Sheets
- How to print address labels from Google Sheets
- How to print Avery 5163 shipping labels from Google Sheets
- Print Avery 5160 labels from Google Sheets
- LabelRows documentation
- All guides
Disclosure: we make LabelRows, the Google Sheets add-on mentioned in this guide. We describe the other methods as fairly as we can, including when they are the better choice.
Google Sheets, Google Docs and Google Workspace are trademarks of Google LLC. Avery is a registered trademark of Avery Products Corporation. Microsoft and Word are trademarks of the Microsoft group of companies. LabelRows and Cellbrook are not affiliated with or endorsed by Google, Avery or Microsoft.